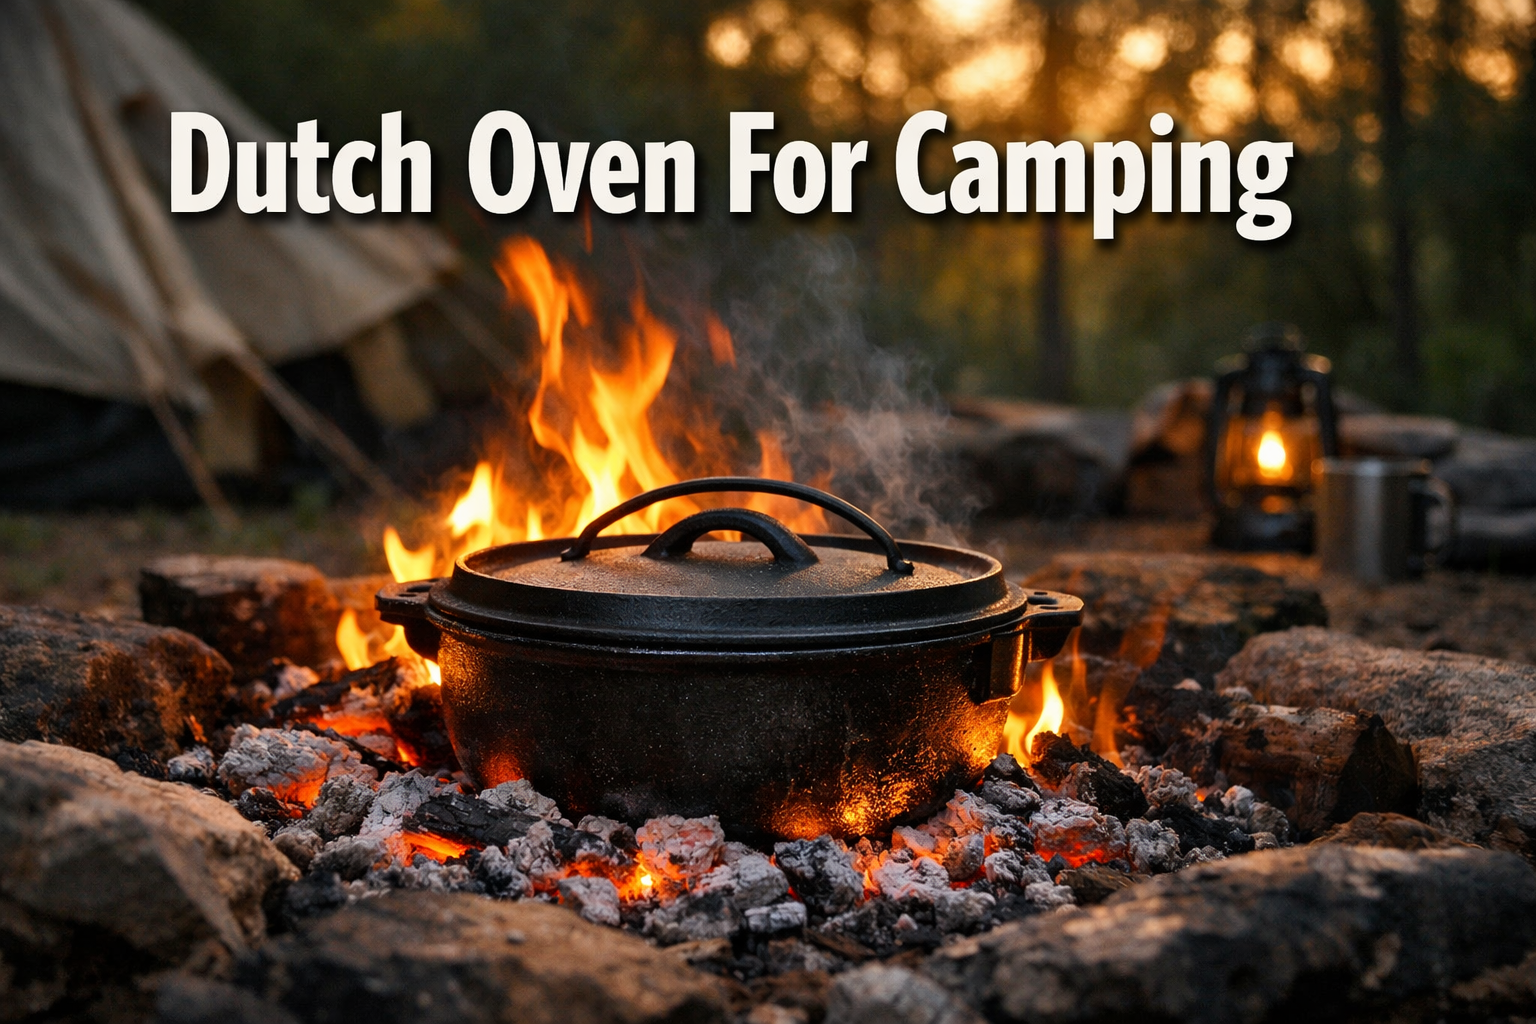
Dutch Oven For Camping
Last updated: February 25, 2026
A cast iron dutch oven transforms campfire cooking from basic survival meals into gourmet outdoor dining experiences. This versatile piece of camping equipment has served outdoor enthusiasts for over 300 years, delivering everything from hearty stews to fresh-baked bread under open skies.
Whether you’re a weekend warrior or a backcountry veteran, understanding how to select and use a Dutch Oven For Camping unlocks unlimited culinary possibilities at your campsite.
Key Takeaways
- Cast iron dutch ovens provide superior heat distribution and retention for consistent campfire cooking results
- The 6-quart size serves 4-6 people and offers the best balance between portability and cooking capacity
- Flanged lids with three-leg designs allow safe coal placement on top and stable positioning in campfire coals
- Budget options like the Lodge Cast Iron Dutch Oven ($65-$80) deliver professional results without premium pricing
- Pre-seasoned models arrive ready to use immediately, eliminating preparation time
- Proper temperature management uses coal ratios: typically 2/3 on top, 1/3 underneath for baking
- Regular seasoning maintenance ensures lifetime durability and improves non-stick performance
- Dutch ovens support multiple cooking methods including baking, roasting, braising, and stewing in one vessel
Quick Answer

A Dutch Oven For Camping is a thick-walled cast iron pot with a tight-fitting lid designed specifically for outdoor cooking over campfires or coals.
The best camping dutch ovens feature three legs for stable coal placement, flanged lids that hold hot coals on top, and bail handles for safe movement.
Most campers choose 6-quart models that serve 4-6 people and cost between $65-$150, with pre-seasoned cast iron construction offering immediate use and lifetime durability when properly maintained.
What Makes a Dutch Oven Ideal for Camping?
A camping dutch oven differs significantly from kitchen versions through specific design features optimized for outdoor cooking. The essential characteristics include three short legs that elevate the pot above coals, a flanged lid with a raised edge that prevents hot coals from sliding off, and a sturdy bail handle for hanging or lifting over open flames.
Cast iron construction provides even heat radiation across all surfaces, eliminating hot spots that burn food. The thick walls retain heat exceptionally well, maintaining consistent cooking temperatures even when weather conditions fluctuate. This heat retention means less fuel consumption and more predictable cooking results.
Key features to prioritize:
- Three-leg design for stable positioning in campfire coals
- Flanged lid that safely holds coals on top for 360-degree heat
- Heavy-duty bail handle rated for the pot’s full weight when loaded
- Pre-seasoned surface ready for immediate cooking
- Tight-fitting lid that traps moisture and heat
Choose a flat-bottom model only if you plan to use it primarily on camp stoves rather than directly in coals. The traditional three-leg design offers far more versatility for authentic campfire cooking techniques.
What Size Dutch Oven For Camping Should You Choose?
The 6-quart size represents the market favorite for camping, serving 4-6 people while remaining portable enough for backpack trips. This capacity handles everything from family stews to whole chickens, striking the ideal balance between cooking versatility and weight considerations.
Capacity guide by group size:
- 4-quart: Solo campers or couples, weighs 12-15 lbs
- 6-quart: Families of 4-6, weighs 15-18 lbs (most popular)
- 8-quart: Groups of 6-8, weighs 18-22 lbs
- 10-12 quart: Large gatherings or commercial use, weighs 25+ lbs
Smaller sizes limit recipe options and require multiple batches for groups. Larger models become cumbersome to transport and require significantly more coals to maintain proper cooking temperatures. A 6-quart dutch oven uses approximately 14-16 charcoal briquettes for standard 350°F baking, while a 12-quart model demands 25+ briquettes.
Common mistake: Buying too large based on “just in case” scenarios. The extra weight discourages regular use, and oversized pots waste fuel heating unnecessary space. Start with a 6-quart model and add a 4-quart for side dishes if needed.
Which Dutch Oven Brands Deliver the Best Value?
The Lodge Cast Iron Dutch Oven remains the recommended budget-friendly choice at $65-$80 for 4-6 quart models, offering exceptional durability without premium pricing. Lodge has manufactured cast iron cookware in the USA since 1896, and their camping dutch ovens arrive pre-seasoned and ready for immediate use.
Top brand comparison:
| Brand | Price Range | Best For | Key Feature |
|---|---|---|---|
| Lodge | $65-$80 | Budget-conscious campers | Pre-seasoned, lifetime warranty |
| Barebones | $150-$200 | Premium aesthetics | Polished finish, elegant design |
| Camp Chef | $80-$120 | Large groups | Heavy-duty construction, 12qt options |
| Overmont | $60-$75 | Best value | Convertible lid doubles as skillet |
| Snow Peak | $200+ | Experienced camp chefs | Specialized performance |
The Overmont 5.7L/6 Quart Dutch Oven offers the best value proposition for 2026, featuring legs on both the bottom and lid, pre-seasoned construction, and a convertible lid that functions as a standalone skillet. This dual-functionality essentially provides two cooking surfaces for the price of one.
Choose Lodge if you want proven reliability and widespread replacement part availability. Select Overmont for maximum versatility on a budget. Invest in Barebones or Snow Peak only if aesthetics and specialized features justify the 2-3x price premium.
How Do You Control Temperature When Cooking With a Dutch Oven For Camping?
Temperature management relies on coal placement ratios rather than guesswork. For standard 350°F baking (ideal for bread, casseroles, and desserts), place approximately 2/3 of your coals on the lid and 1/3 underneath the dutch oven. This top-heavy distribution mimics conventional oven heat patterns.
Coal count formula for 350°F:
- Diameter in inches + 3 = coals on top
- Diameter in inches – 3 = coals underneath
- Example: 12-inch dutch oven = 15 coals on top, 9 underneath
Temperature adjustments:
- 250°F (slow roasting): Reduce total coals by 25%, maintain 2:1 top-to-bottom ratio
- 400°F (searing, crisping): Increase total coals by 25%, shift to 3:1 ratio
- Simmering: Use only bottom coals, remove all top coals
Charcoal briquettes provide more consistent heat than wood coals. Each briquette generates approximately 25°F, and they maintain steady temperatures for 60-90 minutes before requiring replacement. Wood coals burn hotter initially but cool faster, demanding more frequent monitoring.
Professional tip: Rotate the dutch oven 90 degrees and the lid 90 degrees in the opposite direction every 15 minutes. This rotation prevents hot spots and ensures even cooking throughout the vessel.
What Are the Essential Dutch Oven Camping Recipes?
One-pot meals maximize efficiency while minimizing cleanup at the campsite. The dutch oven’s versatility supports breakfast, lunch, dinner, and dessert preparation in a single vessel.
Beginner-friendly recipes:
Campfire Chili (serves 6, 90 minutes)
- Brown 2 lbs ground beef with onions
- Add beans, tomatoes, spices
- Simmer with 8 coals underneath, 16 on top
- Perfect for cold-weather camping
Dutch Oven Bread (serves 8, 45 minutes)
- Use pre-made biscuit dough or simple no-knead recipe
- Bake with 9 coals underneath, 15 on top for 12-inch oven
- Creates crispy crust, soft interior
Breakfast Casserole (serves 6, 40 minutes)
- Layer hash browns, eggs, cheese, breakfast meat
- Bake at 350°F using standard coal ratio
- Prepare the night before for easy morning cooking
Peach Cobbler (serves 8, 35 minutes)
- Canned peaches with cake mix topping
- Requires minimal ingredients and preparation
- Crowd-pleasing dessert that impresses fellow campers
The dutch oven handles braising, roasting, baking, and stewing equally well[4]. Tough cuts of meat become tender through low-and-slow cooking. Vegetables roast to caramelized perfection. Fresh bread develops a crackling crust impossible to achieve in standard camping cookware.
For more specialized baking techniques, explore our guide to oven-safe cookware that translates well to campfire use.
How Do You Season and Maintain Cast Iron Dutch Ovens?
Most modern camping dutch ovens arrive pre-seasoned with soybean oil, making them immediately usable from purchase. However, regular maintenance builds and preserves the natural non-stick surface that improves with each use.
Initial seasoning (if purchasing unseasoned):
- Scrub with hot soapy water to remove factory coating
- Dry completely with towels and heat over campfire 5 minutes
- Apply thin layer of vegetable oil or shortening to all surfaces
- Heat upside-down over coals for 60 minutes
- Let cool naturally, wipe excess oil
- Repeat 2-3 times for optimal seasoning
After-use cleaning protocol:
- Clean while still warm (not hot) for easiest food removal
- Use hot water and stiff brush, avoid soap when possible
- For stuck-on food, boil water in the dutch oven 5 minutes
- Dry thoroughly over low heat to prevent rust
- Apply light oil coating before storage
Common mistake: Using metal utensils that scratch seasoning. Choose wooden or silicone tools that preserve the cooking surface. Small scratches self-heal with continued use and proper oiling.
Store your dutch oven with the lid slightly ajar to allow air circulation. Moisture trapped inside promotes rust formation. Place a paper towel inside to absorb any residual humidity during storage.
The environmental impact of cast iron cookware favors sustainability. A properly maintained dutch oven lasts multiple generations, eliminating the waste cycle of replacing non-stick pans every few years. Cast iron requires no chemical coatings and remains fully recyclable at end of life.
For additional care tips on durable cookware, see our guide to maintaining non-toxic cookware.
What Accessories Enhance Dutch Oven Camping Cooking?
Essential accessories improve safety and expand cooking capabilities beyond the basic dutch oven. Strategic additions solve common campfire cooking challenges without adding significant weight to your gear.
Must-have accessories:
Lid Lifter ($8-15)
- Safely removes hot lid without burns
- Hook design prevents coal spillage
- Eliminates need for improvised tools
Heavy-Duty Gloves ($15-25)
- Heat-resistant leather or aramid fiber
- Protects hands when adjusting coal placement
- Essential for safe bail handle manipulation
Charcoal Chimney Starter ($20-30)
- Prepares coals to perfect temperature in 15 minutes
- Eliminates lighter fluid taste in food
- More reliable than traditional fire-starting methods
Tripod Stand ($30-60)
- Suspends dutch oven over fire for soups and stews
- Adjustable height controls cooking temperature
- Frees up ground space for additional cooking
Parchment Paper Liners ($5-10)
- Prevents sticking for delicate items like cakes
- Simplifies cleanup significantly
- Biodegradable option available for eco-conscious campers
Nice-to-have additions:
- Long-handled tongs for coal placement
- Whisk broom for cleaning ash from lid before opening
- Trivet or heat-resistant mat for setting hot dutch oven
- Recipe cards laminated for outdoor durability
Choose accessories based on your primary cooking style. Bakers need lid lifters and parchment paper. Stew enthusiasts benefit from tripod stands. All users should invest in quality heat-resistant gloves for safety.
Should You Choose Cast Iron or Enameled Dutch Ovens for Camping?

Traditional cast iron dominates camping applications due to superior durability in harsh outdoor conditions. Enameled versions like the Staub Round Cocotte offer easier cleanup and attractive aesthetics but cannot withstand direct coal contact.
Cast iron advantages:
- Withstands direct flame and coal placement
- Develops natural non-stick patina over time
- Handles temperature extremes without damage
- Significantly lower cost ($65-80 vs $200-400)
- Repairable if seasoning degrades
Enameled dutch oven limitations:
- Enamel coating chips when placed directly on coals
- Requires camp stove or grill grate for heat source
- Higher initial investment
- Coating damage irreversible
- Better suited for home-to-camp dual use
Choose enameled only if you primarily cook on camp stoves and want equipment that transitions seamlessly between home kitchens and campsites. The easier cleanup appeals to casual campers who prioritize convenience over traditional campfire cooking.
For authentic campfire cooking with coal placement on top and bottom, cast iron remains the only viable option. The rugged construction tolerates the abuse of outdoor environments that would destroy enameled surfaces.
Explore our comparison of ceramic versus traditional cookware for additional insights on coating durability in demanding conditions.
What Common Dutch Oven Camping Mistakes Should You Avoid?
Improper coal management causes most cooking failures for beginners. Understanding heat dynamics prevents burned bottoms, raw centers, and wasted ingredients.
Critical errors to avoid:
Using too many bottom coals
- Creates scorching on food base
- Solution: Follow 2:1 top-to-bottom ratio for baking
Opening the lid frequently
- Releases heat, extending cooking time 5-10 minutes per peek
- Solution: Trust your timer, check only when necessary
Neglecting lid cleaning before opening
- Ash falls into food when lid removed
- Solution: Brush lid clean with whisk broom first
Cooking without preheating
- Results in uneven cooking and extended times
- Solution: Preheat dutch oven 10 minutes before adding ingredients
Skipping post-cook oiling
- Promotes rust formation during storage
- Solution: Apply thin oil layer while pot still warm
Overfilling the pot
- Prevents proper heat circulation
- Solution: Fill maximum 2/3 capacity for stews, 1/2 for baking
Using soap aggressively
- Strips protective seasoning layer
- Solution: Hot water and stiff brush handle 95% of cleaning needs
Edge case consideration: High-altitude camping (above 8,000 feet) requires temperature adjustments. Water boils at lower temperatures, extending cooking times by 15-25%. Increase coal count by 2-3 briquettes to compensate for reduced atmospheric pressure.
How Do Dutch Ovens Compare to Other Camping Cookware?
Dutch ovens provide unmatched versatility compared to specialized camping cookware, functioning as pot, pan, oven, and roaster in one vessel. This consolidation reduces pack weight and gear complexity for multi-day trips.
Comparison with alternatives:
vs. Camping Stove Pots
- Dutch oven: Bakes, roasts, and creates complex dishes
- Stove pot: Limited to boiling and simmering
- Weight: Dutch oven heavier (15-18 lbs vs 2-4 lbs)
- Fuel: Dutch oven uses free wood/coals vs purchased fuel
. Portable Grills
- Dutch oven: Weather-resistant, enclosed cooking
- Grill: Wind-sensitive, open-flame only
- Versatility: Dutch oven handles liquids and baking
- Setup: Dutch oven simpler, no assembly required
vs. Backpacking Cookware
- Dutch oven: Car camping and base camp focused
- Backpacking gear: Ultralight, minimal cooking options
- Durability: Dutch oven lasts generations
- Meal quality: Dutch oven enables restaurant-quality dishes
The dutch oven excels for car camping, RV trips, and established campsites where weight matters less than meal quality. Backpackers and ultralight enthusiasts need lighter alternatives. For base camp cooking where you stay multiple days, nothing matches the dutch oven’s capability.
Consider our recommendations for lightweight cookware options if portability outweighs cooking versatility for your trips.
What Future Innovations Are Coming to Camping Dutch Ovens?
Lightweight hybrid designs combining cast iron with stainless steel represent the predicted evolution for 2026 and beyond. Manufacturers experiment with composite materials that reduce weight while maintaining heat retention properties.
Emerging trends:
Locking Lid Mechanisms
- Prevents spills during transport
- Enables inverted cooking techniques
- Currently in prototype phase for major brands
Color Options Beyond Black
- Colored enamel interiors with cast iron exteriors
- Maintains coal-contact durability with aesthetic appeal
- Premium pricing expected ($150-200 range)
Integrated Temperature Monitoring
- Heat-resistant thermometers built into lid
- Eliminates guesswork in coal management
- Early models available from specialty manufacturers
Modular Stacking Systems
- Multiple dutch ovens designed to stack safely
- Shared heat source for multi-course meals
- Reduces total coal consumption by 30%
Sustainable Manufacturing
- Recycled cast iron from automotive industry
- Carbon-neutral production facilities
- Biodegradable packaging materials
Traditional cast iron construction will remain dominant due to proven performance and affordability. Innovations target convenience features rather than replacing fundamental design principles that have worked for centuries.
The global campfire cooking traditions influence modern dutch oven design. South African potjie pots inspire three-leg configurations. Australian camp oven techniques inform lid flange designs. Dutch braising methods from the 1700s continue to guide heat distribution engineering.

FAQ
What is the best size dutch oven for camping?
A 6-quart dutch oven serves 4-6 people and offers the ideal balance between cooking capacity and portability, weighing 15-18 pounds and handling everything from stews to whole chickens.
Can you use a regular dutch oven for camping?
Kitchen dutch ovens with flat bottoms work on camp stoves but cannot be placed directly in campfire coals. Camping models need three legs and flanged lids for proper coal placement and heat management.
How many coals do you need for a camping dutch oven?
For 350°F baking in a 12-inch dutch oven, use 15 coals on top and 9 underneath. The formula is diameter in inches plus 3 for top coals, minus 3 for bottom coals.
Do you need to season a pre-seasoned dutch oven?
Pre-seasoned dutch ovens are ready for immediate use. Simply rinse, dry, and start cooking. Additional seasoning layers develop naturally with regular use and proper maintenance.
How do you clean a dutch oven while camping?
Clean while warm using hot water and a stiff brush. Avoid soap when possible. For stuck food, boil water in the pot for 5 minutes. Dry thoroughly over low heat and apply a thin oil coating.
Can enameled dutch ovens be used for camping?
Enameled dutch ovens work on camp stoves but cannot touch hot coals directly. The enamel coating chips and cracks under direct flame exposure, limiting their campfire cooking applications.
What’s the difference between a dutch oven and a camp oven?
Camp ovens feature three legs for coal placement and flanged lids that hold coals on top. Dutch ovens typically have flat bottoms designed for stovetop use. The terms are often used interchangeably for camping models.
FAQs Continued
How long does a cast iron dutch oven last?
With proper care, cast iron dutch ovens last multiple generations. The material doesn’t degrade, and seasoning can always be restored. Many families pass down dutch ovens for 50+ years.
What can you cook in a camping dutch oven?
Dutch ovens handle stews, roasts, bread, casseroles, cobblers, breakfast dishes, and one-pot meals. They support baking, braising, roasting, simmering, and frying in a single vessel.
How heavy is a 6-quart camping dutch oven?
A 6-quart cast iron camping dutch oven weighs approximately 15-18 pounds empty. When loaded with food and coals, total weight reaches 25-30 pounds, requiring sturdy surfaces and careful handling.
Can you stack multiple dutch ovens while cooking?
Yes, dutch ovens can stack vertically with coals between each layer. This technique maximizes heat efficiency and allows simultaneous cooking of multiple dishes using shared heat sources.
What temperature do dutch ovens reach over campfires?
Properly managed coal placement achieves 250°F to 450°F. Standard baking temperature of 350°F uses approximately 14-16 briquettes for a 6-quart model with 2:1 top-to-bottom coal distribution.
Conclusion
A dutch oven for camping transforms outdoor cooking from necessity into culinary adventure. The combination of superior heat distribution, multi-method versatility, and generational durability makes cast iron dutch ovens essential equipment for serious campers.
Whether you choose the budget-friendly Lodge at $65 or invest in premium options like Barebones or Snow Peak, the fundamental cooking performance remains exceptional.
Success with campfire dutch oven cooking requires understanding temperature management through proper coal placement, maintaining seasoning for non-stick performance, and selecting the right size for your group.
The 6-quart capacity serves most camping scenarios perfectly, while essential accessories like lid lifters and heat-resistant gloves enhance safety and convenience.
Start your dutch oven camping journey by selecting a quality 6-quart cast iron model from Lodge or Overmont. Practice temperature control with simple recipes like chili or bread before attempting complex dishes. Master the basic 2:1 coal ratio for 350°F baking, and you’ll unlock unlimited meal possibilities at every campsite.
The investment pays dividends for decades. Unlike disposable camping gear that requires frequent replacement, a properly maintained cast iron dutch oven becomes a family heirloom that improves with age. Each meal adds character to the seasoning, creating a cooking surface uniquely yours.
Explore our collection of healthy cooking equipment and budget-friendly cookware options to complement your camping kitchen setup. The outdoor cooking adventure begins with the right tools and knowledge to use them effectively.
2 responses to “Dutch Oven For Camping: Best Picks 2026”
[…] tradeoff: Price. A 5.5-quart Signature Round Dutch Oven runs $420-$500 at retail. That said, Le Creuset offers a limited lifetime warranty, and many […]
[…] deep, wide body of the Dutch Oven makes it ideal for soups, chilis, and one-pot pasta dishes. The even heat distribution prevents […]