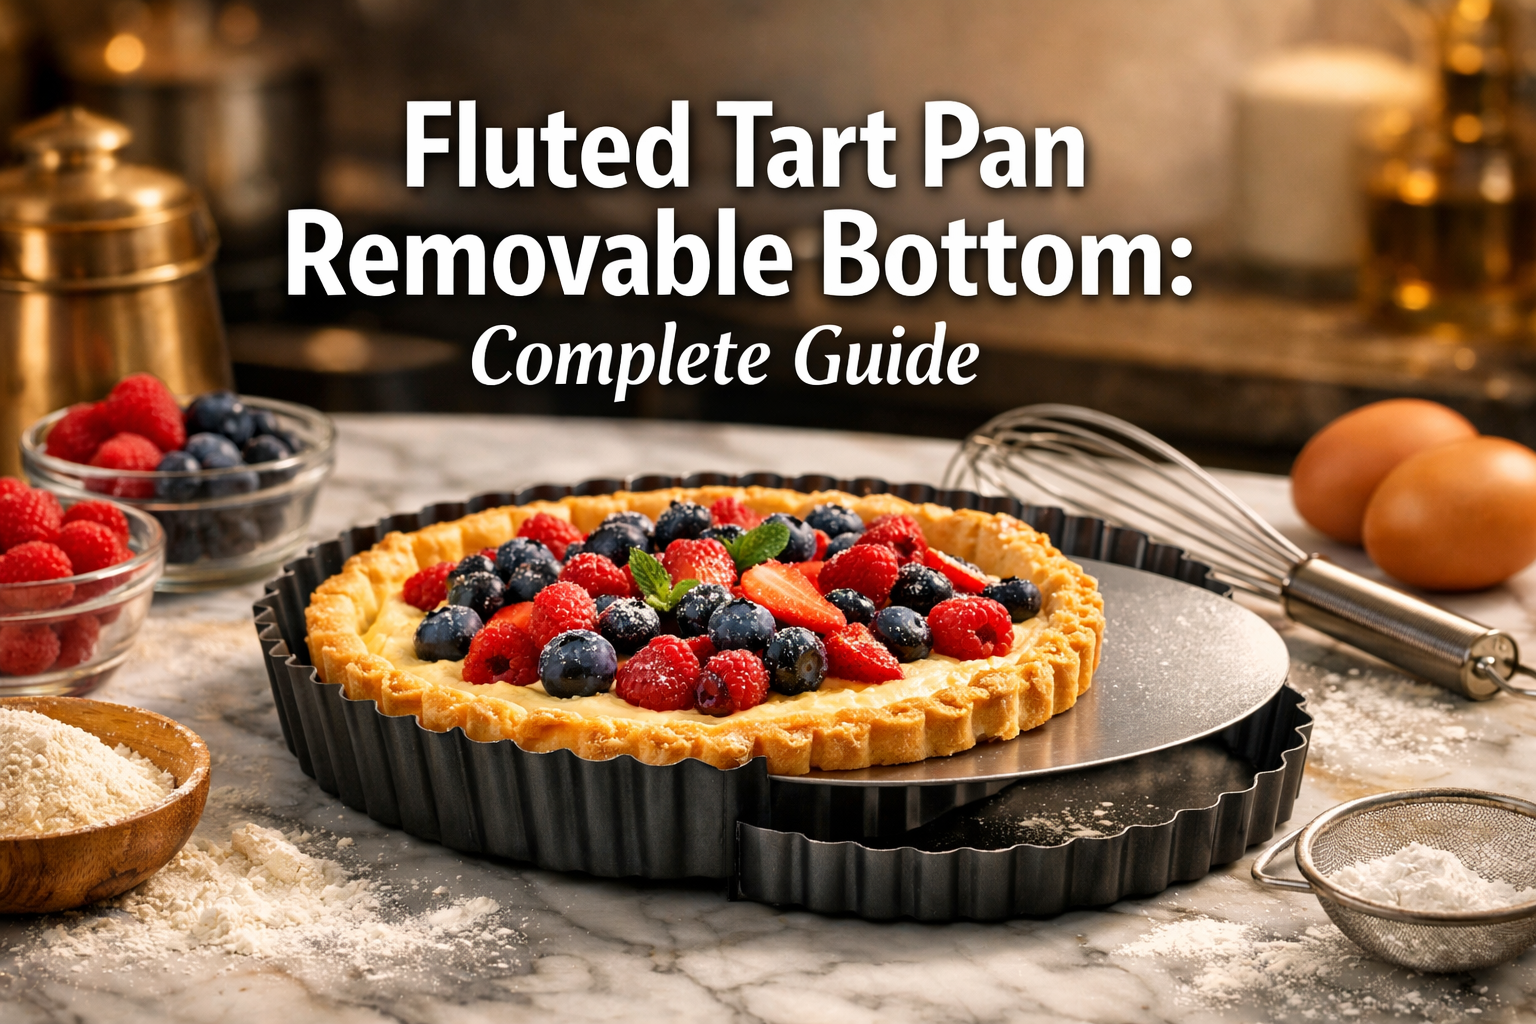
Fluted Tart Pan Removable Bottom
Picture this: A pastry chef carefully lifts a golden-brown fruit tart from its pan, and the fluted edges release perfectly, not a single crack, not one broken scallop. The secret? A Fluted Tart Pan Removable Bottom that transforms amateur bakers into confident pastry artists.
Whether crafting delicate French tarts, rustic galettes, or show-stopping quiches, this essential piece of bakeware has revolutionized how home bakers achieve professional results.
The fluted tart pan with removable bottom isn’t just another piece of kitchen equipment, it’s the difference between serving a beautiful, intact tart and wrestling with broken pastry stuck to a traditional pan.
In 2026, as home baking continues its surge in popularity, understanding this specialized tool has become essential for anyone serious about pastry making.
Key Takeaways
- Fluted tart pans with removable bottoms feature two-piece construction that allows easy release of delicate tarts without damage to edges or filling
- Material choice matters: Carbon steel, stainless steel, and aluminized steel each offer distinct advantages for heat distribution and durability
- Size versatility ranges from 4-inch individual portions to 12-inch statement pieces, with 9-11 inches being most popular for home bakers
- Proper technique for using removable bottoms ensures professional presentation and extends pan lifespan significantly
- Investment quality varies from budget-friendly options under $15 to professional-grade pans exceeding $50, with mid-range options offering excellent value
Understanding the Fluted Tart Pan Removable Bottom Design

The Engineering Behind Two-Piece Construction
The genius of the fluted tart pan removable bottom lies in its elegantly simple design.
Unlike traditional one-piece pans, this bakeware consists of two distinct components: an outer ring with decorative fluted edges and a flat, removable base that sits inside.
This configuration creates a mechanical advantage that professional bakers have relied upon for decades.
The outer ring typically features vertical ridges or flutes, usually ranging from 12 to 24 individual scallops depending on pan size, that create the signature decorative edge associated with French-style tarts.
These aren’t merely aesthetic; the fluted design actually strengthens the pan structure while providing increased surface area for even heat distribution during baking[1].
The removable bottom, often called a “loose bottom” in professional kitchens, sits snugly within a small lip inside the ring.
This creates a seal tight enough to contain liquid batters during baking but loose enough to release easily once the tart has cooled.
The base typically measures slightly smaller in diameter than the outer ring’s interior, allowing it to drop down when the ring is lifted away.
Why this design revolutionized tart making:
- ✨ Clean release: No inverting or prying required
- 🎨 Pristine presentation: Fluted edges remain intact
- 🔧 Versatile serving: Remove ring entirely or serve on base
- 💪 Reduced breakage: Minimal handling of delicate pastry
Materials That Make a Difference
Not all fluted tart pans with removable bottoms perform equally. The material composition dramatically affects heat conductivity, durability, and the quality of your finished product.
Understanding these differences helps bakers make informed decisions when choosing the right bakeware.
Carbon Steel with Non-Stick Coating: The most popular choice among home bakers, carbon steel offers excellent heat conductivity at an affordable price point.
The non-stick coating, typically PTFE-based or ceramic, facilitates easy release and clean up. Brands like Fat Daddio’s have perfected this combination, creating pans that brown crusts evenly while maintaining structural integrity through hundreds of uses[2].
Stainless Steel: Preferred by professional pastry chefs for its durability and non-reactive properties, stainless steel doesn’t warp under high temperatures and resists corrosion indefinitely.
While it lacks the non-stick convenience of coated options, proper preparation with butter and flour creates adequate release. Stainless steel bakeware represents a lifetime investment for serious bakers.
Aluminized Steel: This material combines aluminum’s superior heat conductivity with steel’s structural strength.
The aluminized coating prevents oxidation while distributing heat remarkably evenly—crucial for achieving that perfect golden-brown crust without hot spots that can burn delicate pastry.
Tin-Plated Steel: Traditional European tart pans often feature tin plating over steel. These pans develop a natural patina over time that enhances non-stick properties.
French brands like Gobel and Matfer Bourgeat continue this heritage, though they require more careful maintenance than modern coated options.
Size Selection Strategy
Choosing the right size fluted tart pan removable bottom depends on serving needs, recipe specifications, and storage constraints. The most common sizes and their applications include:
| Pan Diameter | Servings | Best Uses | Storage Consideration |
|---|---|---|---|
| 4-5 inches | 1-2 | Individual tartlets, appetizers | Stackable, minimal space |
| 7-8 inches | 4-6 | Small family desserts, quiche | Compact, versatile |
| 9-10 inches | 6-8 | Standard recipes, dinner parties | Most common, easy to store |
| 11-12 inches | 10-12 | Large gatherings, special occasions | Requires dedicated storage |
Professional bakers often maintain a collection spanning multiple sizes, but home bakers typically find a 9-inch and 4-inch set covers most needs.
The 9-inch size aligns with the majority of published tart recipes, while 4-inch pans enable elegant individual presentations for dinner parties[3].
Mastering Techniques for the Fluted Tart Pan Removable Bottom
Preparation Methods for Perfect Release
Even with a removable bottom, proper pan preparation remains essential for achieving flawless results. The technique varies slightly depending on pan material and recipe type.
For Non-Stick Coated Pans: While manufacturers often claim no preparation necessary, experienced bakers know better. A light coating of butter or neutral oil, applied with a pastry brush to both the fluted sides and base, provides insurance against sticking. For particularly delicate pastries, dust with flour after greasing, tapping out excess—this creates a barrier that guarantees release.
For Uncoated Metal Pans: These require more thorough preparation. Use softened butter to coat every flute and crevice, then refrigerate for 10 minutes before applying a second coat. Dust generously with flour, cocoa powder (for chocolate tarts), or finely ground nuts for added flavor. This double-layer approach creates a reliable release mechanism.
The Parchment Paper Technique: For recipes with particularly sticky fillings or when using older pans with compromised coatings, cut a parchment circle slightly larger than the base. Place it between the base and the outer ring before adding pastry. This guarantees the tart will lift cleanly, though it sacrifices some of the removable bottom’s convenience.
“The difference between a good tart and a great tart often comes down to those final moments of release. A properly prepared fluted pan with removable bottom makes that critical step fool proof.” — Pastry Chef Marie Dubois
The Art of Blind Baking in Fluted Pans
Blind baking—pre-baking pastry shells before adding filling—presents unique considerations when using a fluted tart pan removable bottom. The two-piece construction requires specific techniques to prevent pastry from puffing up or sliding down the fluted sides.
Step-by-Step Blind Baking Process:
- Line the pastry: After pressing pastry into the prepared pan, refrigerate for 30 minutes to firm the butter in the dough
- Add parchment: Cut parchment paper 2 inches larger than the pan diameter and press it gently into all flutes
- Weight appropriately: Fill with pie weights, dried beans, or rice, ensuring weights reach up the fluted sides to support them during baking
- Initial bake: Bake at 375°F (190°C) for 15-20 minutes until edges set
- Remove weights: Carefully lift out parchment and weights, then return to oven for 5-10 minutes to dry the base
The removable bottom actually simplifies blind baking because it conducts heat directly to the pastry base, promoting even browning. However, avoid placing the pan directly on a baking sheet during blind baking—this can trap heat and cause soggy bottoms. Instead, use the oven rack directly for optimal air circulation.
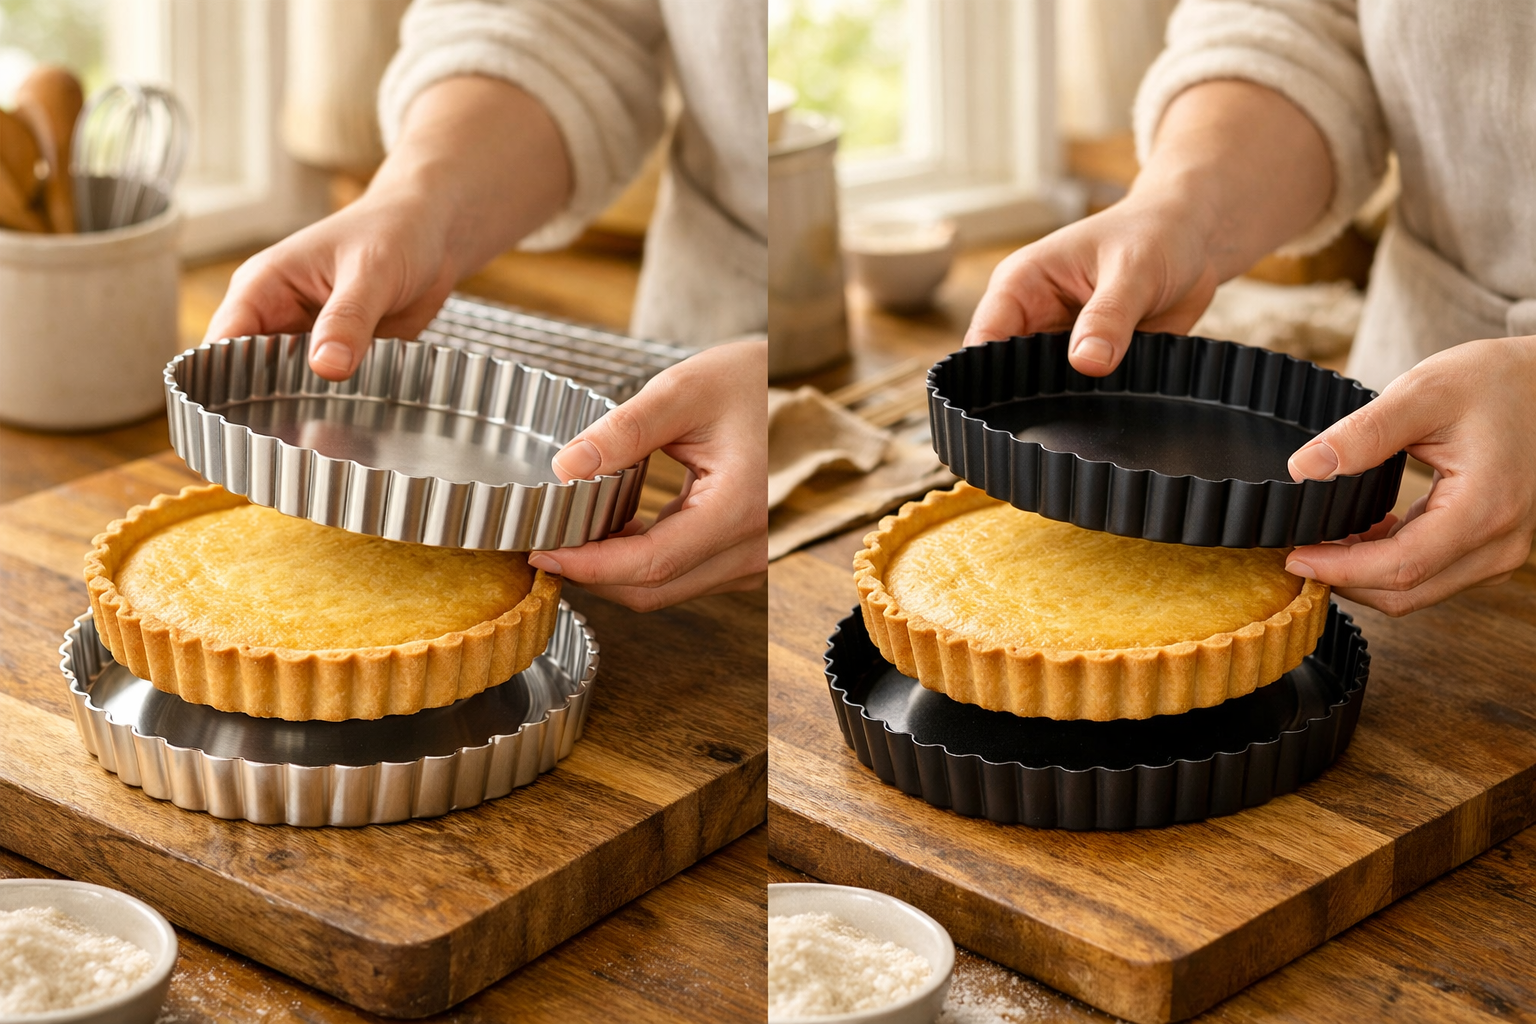
Removing Your Tart Like a Professional
The moment of truth arrives when it’s time to unmold your creation. Proper technique prevents disasters and ensures your tart looks as spectacular as it tastes. For those new to baking essentials, mastering this skill builds confidence for more advanced projects.
The Standard Removal Method:
- Allow the tart to cool completely in the pan—attempting early removal risks structural collapse
- Place the pan on a sturdy, inverted bowl or large can (slightly smaller than the pan’s diameter)
- Gently press down on the outer ring, allowing it to slide down around the bowl
- The tart remains supported on the base, with fluted edges perfectly intact
- Slide a thin spatula between the base and tart bottom to transfer to a serving plate, or serve directly on the base
For Delicate or Cream-Filled Tarts:
When working with fragile fillings that might shift during transfer, leave the tart on its metal base for serving. Most modern fluted tart pan removable bottoms feature bases with smooth, finished edges designed for presentation. Simply place the base on your serving platter—the thin metal disappears visually beneath the tart.
Emergency Removal Techniques:
If pastry sticks despite proper preparation, don’t panic. Warm the pan’s exterior gently with a kitchen torch or hot towel for 30 seconds—this softens any butter or sugar causing adhesion. For stubborn spots, slide a thin offset spatula between pastry and pan, working carefully around the circumference.
Selecting Quality: Brands and Investment Considerations
Premium Brands Worth the Investment
The market for fluted tart pans with removable bottoms spans from budget options to professional-grade investments. Understanding what separates exceptional pans from mediocre ones helps bakers make purchases they won’t regret.
Nordic Ware: This American manufacturer has built a reputation on innovation and quality. Their fluted tart pans feature heavy-gauge aluminized steel construction with reinforced rims that prevent warping even after years of use. The proprietary non-stick coating releases consistently, and the pans carry a lifetime warranty. Prices typically range from $25-35, positioning them in the premium-but-accessible category[4].
Fat Daddio’s: Professional bakers consistently rank Fat Daddio’s among top choices for commercial kitchens. Their anodized aluminum construction eliminates chemical coatings entirely while providing naturally non-stick properties. The material won’t rust, chip, or peel, and conducts heat with remarkable uniformity. These pans represent serious investments at $35-50, but their performance justifies the cost for frequent bakers.
Gobel: French heritage meets modern manufacturing in Gobel’s tin-plated steel tart pans. Used in Parisian patisseries for generations, these pans develop a seasoned patina that improves with use. The fluting is exceptionally precise, creating restaurant-quality presentations. At $40-60, they’re investments in both function and tradition.
Matfer Bourgeat: Another French manufacturer favored by culinary professionals, Matfer Bourgeat produces pans that balance traditional craftsmanship with contemporary materials. Their non-stick versions use PTFE coatings applied to exacting standards, while their bare steel options appeal to purists. Prices range from $30-55 depending on size and finish.
Budget-Friendly Options That Perform
Not every baker needs professional-grade equipment, especially when starting out or baking occasionally. Several manufacturers produce budget-friendly baking pans that deliver reliable results without premium price tags.
Wilton: The accessible choice for home bakers, Wilton’s fluted tart pans with removable bottoms typically cost $12-18. While they won’t last decades like premium options, they perform admirably for occasional use. The non-stick coating releases well for the first 50-100 uses, making them excellent starter pans or backups for busy baking seasons.
Chicago Metallic: Positioned in the mid-range at $18-25, Chicago Metallic offers commercial-grade construction at consumer-friendly prices. Their pans feature carbon steel with silicone-based non-stick coatings that outperform budget competitors. These represent excellent value for regular home bakers who want durability without premium costs.
Store Brands: Major retailers like Williams-Sonoma and Sur La Table offer house-brand tart pans manufactured to their specifications. These typically cost $15-20 and provide good performance, though quality can vary between production runs. Reading recent reviews helps identify current quality levels.
What to Look for When Shopping
Beyond brand reputation, specific features distinguish superior fluted tart pans with removable bottoms from inferior ones. Evaluate these characteristics before purchasing:
Construction Quality Indicators:
- ✅ Uniform thickness throughout (no thin spots that create hot spots)
- ✅ Smooth, burr-free edges on both ring and base
- ✅ Tight but not overly snug fit between base and ring
- ✅ Reinforced rim on the outer ring to prevent warping
- ✅ Even, complete coating coverage on non-stick versions
Size and Depth Considerations:
Standard tart pans measure 1-1.25 inches deep, suitable for most recipes. Deeper versions (1.5-2 inches) accommodate quiches and pies but may require recipe adjustments. Ensure the depth matches your typical baking needs, a collection of standard-depth pans in various diameters proves more versatile than a single deep pan.
Heat Tolerance:
Quality pans tolerate temperatures up to 450°F (230°C) or higher. This matters for recipes requiring high-heat starts or broiler finishing. Check manufacturer specifications, especially for non-stick pans where coating limitations may restrict temperature ranges.
Care, Maintenance, and Longevity
Cleaning Techniques That Preserve Your Pan
Proper cleaning extends the lifespan of fluted tart pans with removable bottoms significantly. The two-piece construction requires attention to prevent buildup in the seam where base meets ring. Following simple bakeware cleanup tips keeps pans performing optimally.
Immediate Post-Baking Care:
After removing your tart, allow the pan to cool completely before washing. Thermal shock from cold water on hot metal can warp even premium pans. Once cooled, separate the base from the ring—this prevents moisture from becoming trapped in the seam, which can cause rust or corrosion over time.
For Non-Stick Coated Pans:
Hand washing with warm water and mild dish soap preserves coating integrity far better than dishwasher cycles. Use soft sponges or cloths, never abrasive scrubbers that scratch protective layers.
For stubborn residue, soak in warm soapy water for 15-20 minutes before gently wiping clean. Dry thoroughly with a soft towel, paying special attention to the fluted crevices where water can hide.
For Uncoated Metal Pans:
Bare metal tolerates more aggressive cleaning but still benefits from gentle treatment. After washing, dry immediately and completely to prevent rust. Some bakers apply a thin coat of neutral oil to bare steel or tin-plated pans before storage, creating a protective barrier against moisture and oxidation.
Dealing with Baked-On Residue:
When pastry or filling adheres stubbornly, create a paste from baking soda and water. Apply to affected areas, let sit for 10 minutes, then gently scrub with a soft brush.
For non-stick pans, substitute white vinegar for baking soda to avoid coating damage. Never use metal utensils or steel wool, which permanently damage both coatings and bare metal finishes.
Storage Solutions for Fluted Pans
The fluted edges that create beautiful presentations also make these pans challenging to store efficiently. Smart organization prevents damage while maximizing kitchen space, especially important for those managing bakeware for small kitchens.
Vertical Storage Systems:
Install adjustable dividers in a deep drawer or cabinet, creating slots that hold pans vertically like files. This approach protects fluted edges from compression while allowing easy access to specific sizes. The removable bottoms can be stacked separately, dramatically reducing space requirements.
Protective Stacking:
When stacking is necessary, place paper towels, felt pan protectors, or silicone mats between pans. This cushioning prevents scratches to non-stick coatings and protects delicate fluting. Nest pans of significantly different sizes rather than similar sizes to minimize contact points.
Hanging Solutions:
For frequently used pans, install sturdy hooks on walls or inside cabinet doors. Hang pans by their outer rings, allowing air circulation that prevents moisture accumulation. This method works particularly well in professional kitchens where quick access matters.
When to Replace Your Tart Pan
Even quality fluted tart pans with removable bottoms eventually require replacement. Recognizing these signs prevents frustration and failed bakes:
Definitive Replacement Indicators:
- 🔴 Warping that prevents the base from sitting flush
- 🔴 Non-stick coating peeling, flaking, or showing bare metal
- 🔴 Rust that persists despite cleaning and drying
- 🔴 Loose fit between base and ring causing leaks
- 🔴 Dents or damage to fluted edges affecting presentation
Extending Lifespan:
With proper care, premium pans last 10-15 years or longer. Budget options typically provide 3-5 years of reliable service.
Rotating between multiple pans rather than using a single favorite distributes wear, extending the collection’s overall lifespan.
Consider maintaining both premium and budget pans—reserve the best for special occasions while using budget versions for everyday baking.
Creative Applications Beyond Traditional Tarts
Savory Creations in Fluted Pans
While sweet tarts dominate most discussions of fluted pans with removable bottoms, savory applications showcase this versatile tool’s full potential. The professional presentation elevates simple ingredients into impressive dishes worthy of dinner parties.
Quiche Variations:
The fluted tart pan creates quiches with restaurant-quality appearance. The removable bottom allows serving individual slices with intact, decorative edges, impossible with traditional pie pans. Classic combinations like Lorraine, mushroom and gruyere, or Mediterranean vegetable benefit from the elegant presentation. The pan’s heat distribution ensures custard sets evenly while the crust browns perfectly.
Savory Galettes:
Free-form galettes gain structure and sophistication when baked in fluted pans. Layer caramelized onions, roasted vegetables, or tomatoes with cheese, fold pastry edges inward, and bake. The fluted sides guide the rustic fold while the removable bottom facilitates serving.
Pot Pies Reimagined:
Transform traditional pot pie into an elegant presentation by using the fluted tart pan. Fill the pastry shell with your favorite pot pie filling, top with a second pastry round or decorative cut outs, and bake. The removable bottom allows serving individual portions that showcase layers beautifully.
Appetizer Tarts:
Small 4-5 inch fluted pans create impressive appetizers. Caramelized onion and goat cheese, fig and prosciutto, or roasted pepper and feta combinations become conversation pieces. The individual portions eliminate cutting and serving challenges while looking professionally crafted.
Sweet Innovations and Modern Twists
Beyond classic fruit tarts and custard-filled pastries, contemporary bakers push creative boundaries with fluted tart pans, developing recipes that showcase both skill and imagination.
No-Bake Applications:
The fluted pan’s removable bottom excels for no-bake creations. Press cookie crumb crusts into the pan, fill with cheesecake, mousse, or ganache, and refrigerate until set. The clean release reveals professional-looking desserts without requiring baking skills. This technique particularly suits summer months when oven use is undesirable.
Layered Dessert Tarts:
Create visual drama with transparent layers: chocolate ganache, vanilla pastry cream, and fruit gelée, for example. The fluted edges frame these layers like artwork, while the removable bottom allows slicing that displays the striations beautifully.
Ice Cream Tarts:
Line the pan with cookies or brownies, fill with softened ice cream, and freeze. The removable bottom enables clean slicing of frozen desserts, nearly impossible with one-piece pans. Top with sauce, whipped cream, or fresh fruit just before serving for an impressive yet simple dessert.
Breakfast Pastries:
Giant Danish-style pastries baked in fluted tart pans create weekend brunch centerpieces. Fill with cream cheese and fruit, almond paste, or chocolate, then bake until golden. The presentation rivals professional bakeries while the removable bottom ensures intact service.
Comparing Fluted Tart Pans to Alternative Bakeware
Fluted vs. Straight-Sided Tart Pans
Understanding the differences between fluted and straight-sided tart pans helps bakers choose appropriately for specific recipes and presentations. Both styles offer removable bottoms, but their applications diverge significantly.
Aesthetic Considerations:
Fluted pans create the classic French tart appearance with decorative scalloped edges that add visual interest. Straight-sided pans produce modern, minimalist presentations suited to contemporary plating styles. The choice often depends on the overall menu aesthetic and personal preference.
Structural Differences:
The vertical ridges in fluted pans provide structural reinforcement, allowing thinner metal construction without sacrificing strength. Straight-sided pans require thicker gauge metal to maintain rigidity, potentially affecting heat distribution and weight.
Filling Capacity:
For identical diameter and depth measurements, straight-sided pans hold slightly more filling because flutes reduce interior volume. This matters for recipes with specific yield requirements or when maximizing servings.
Release Characteristics:
Fluted edges create more surface area where pastry contacts metal, potentially increasing sticking points. However, the ridges also provide natural separation points that can facilitate release when properly prepared. Straight sides offer fewer contact points but lack the mechanical advantage of fluted separation.
Tart Pans vs. Pie Plates
While both produce circular pastries, tart pans with removable bottoms and traditional pie plates serve distinct purposes. Understanding these differences prevents recipe failures and sets appropriate expectations.
Depth and Proportion:
Tart pans typically measure 1-1.25 inches deep with straight or fluted sides, creating shallow pastries with high crust-to-filling ratios.
Pie plates range from 1.5-2.5 inches deep with sloped sides, accommodating generous fillings.
This fundamental difference affects recipe conversions, a pie recipe won’t fit properly in a tart pan without adjustments.
Crust Style:
Tart pastry (pâte sucrée or pâte brisée) is firmer and more cookie-like than flaky pie crust, designed to stand without support. The removable bottom of tart pans enables free-standing service, while pie slices require plate support. This affects both presentation and eating experience.
Serving Methodology:
Tart pans’ removable bottoms facilitate elegant plating, individual slices stand upright, displaying cross-sections. Pie plates require scooping or careful spatula work, with slices often losing structural integrity during service. For formal presentations, tart pans offer distinct advantages.
Versatility:
Pie plates accommodate both sweet and savory applications with equal facility and tolerate wetter fillings due to their depth.
Tart pans excel at showcasing fillings with lower moisture content and benefit from the professional presentation their construction enables.
Many serious bakers maintain both types, selecting based on specific recipe requirements.
Environmental and Health Considerations
Sustainable Bakeware Choices
As environmental awareness grows in 2026, many bakers seek sustainable bakeware options that minimize ecological impact while maintaining performance standards. Fluted tart pans with removable bottoms present several sustainability considerations.
Material Longevity:
The most sustainable choice is often the most durable. Premium stainless steel or well-maintained carbon steel pans lasting 15+ years generate far less waste than budget pans replaced every few years. While initial costs are higher, the lifetime environmental impact favors quality investments.
Coating Considerations:
Traditional PTFE non-stick coatings raise environmental concerns during manufacturing and disposal. Ceramic coatings offer more eco-friendly alternatives, though they typically don’t last as long.
Bare metal pans eliminate coating concerns entirely but require more preparation and maintenance. Bakers must balance convenience against environmental priorities.
Manufacturing Practices:
Some manufacturers prioritize sustainable production methods, using recycled metals, renewable energy, and responsible labor practices.
Brands like Nordic Ware increasingly highlight these commitments, appealing to environmentally conscious consumers. Researching manufacturer practices helps align purchases with values.
End-of-Life Planning:
Metal bakeware is infinitely recyclable, unlike silicone or coated pans with limited recycling options. When pans finally wear out, separating components (removing any plastic handles or silicone elements) ensures proper recycling. Some municipalities accept all metal bakeware in standard recycling, while others require special processing.
Health-Conscious Material Selection
Beyond environmental concerns, health considerations influence bakeware choices. Understanding material safety helps bakers make informed decisions, particularly important for those exploring healthy, non-toxic bakeware.
PFOA and PTFE Concerns:
While modern non-stick coatings no longer contain PFOA (perfluorooctanoic acid), some health-conscious bakers avoid all PTFE-based coatings.
When heated above 500°F (260°C), these coatings can release fumes, though this exceeds normal baking temperatures. For those concerned, ceramic-coated or bare metal pans eliminate these worries entirely.
Ceramic Coating Benefits:
Ceramic non-stick coatings use sol-gel technology to create slick surfaces without synthetic polymers. They tolerate higher temperatures than PTFE and don’t release concerning fumes. However, ceramic coatings are more fragile and typically last 2-3 years with regular use versus 5-7 years for quality PTFE coatings.
Bare Metal Safety:
Stainless steel, carbon steel, and aluminum present minimal health concerns when used properly. Stainless steel is completely non-reactive. Carbon steel requires seasoning but is otherwise inert.
Aluminum can react with acidic foods, though anodized aluminum eliminates this concern. For maximum peace of mind, bare metal pans offer transparency, what you see is what you get.
Proper Usage Practices:
Regardless of material choice, proper usage maximizes safety. Never preheat empty non-stick pans, which can damage coatings and release fumes.
Avoid metal utensils that scratch protective layers. Replace pans when coatings show damage, exposed base metals or flaking coatings compromise both performance and safety.
Troubleshooting Common Challenges
Preventing and Fixing Stuck Tarts
Despite the removable bottom’s convenience, tarts occasionally stick, creating frustration and potentially ruining hours of work. Understanding prevention and remediation strategies saves both desserts and sanity.
Prevention Strategies:
The best approach is preventing sticking before it occurs. Even non-stick pans benefit from preparation, butter and flour create insurance against adhesion.
For particularly delicate or sugary fillings, parchment paper between the base and pastry provides foolproof release. Allowing complete cooling before attempting removal prevents structural damage to warm, fragile pastry.
Temperature Manipulation:
If pastry sticks despite precautions, temperature adjustments often solve the problem. Briefly warming the pan’s exterior softens butter and sugar causing adhesion. Use a kitchen torch, hot towel, or even a few seconds over a low burner (moving constantly to prevent burning). Conversely, refrigerating stuck tarts for 30 minutes sometimes contracts metal enough to break the bond.
Mechanical Release Techniques:
For stubborn adhesion, slide a thin offset spatula or butter knife between pastry and pan, working gently around the circumference. Apply steady, gentle pressure rather than forcing—patience prevents breaking the tart. If the base sticks to pastry after removing the ring, slide a thin spatula underneath while supporting the tart from above.
Salvaging Damaged Tarts:
When prevention and gentle removal fail, creative salvaging saves the day. Broken edges can be disguised with whipped cream, fresh fruit, or chocolate shavings.
Completely shattered tarts can be transformed into parfaits,layer broken pieces with cream and fruit in glasses for an entirely different but equally delicious presentation.
Addressing Warping and Fit Issues
Temperature fluctuations and improper care can cause warping that affects the fit between base and ring. This compromises the pan’s functionality and may require replacement, but several strategies can extend usable life.
Identifying Warping:
Place the base on a flat surface and check for rocking or gaps. Inspect the ring by looking along its edge—warping creates waves rather than a smooth circle.
Minor warping (less than 1/8 inch deviation) rarely affects performance, while severe warping prevents proper sealing and should prompt replacement.
Preventing Warping:
Never subject pans to thermal shock—allow gradual temperature changes. Don’t place hot pans under cold water or transfer directly from oven to refrigerator.
Avoid dishwashers, where extreme temperature cycles accelerate warping. Store pans flat or vertically rather than hanging by their rims, which can cause gradual distortion over time.
Working with Warped Pans:
Slightly warped pans can still function with adjustments. For bases that don’t sit flush, place a sheet of parchment paper between base and pastry to prevent leaking.
If the ring no longer forms a perfect circle, use the pan for free-form galettes or rustic tarts where imperfect shapes add character rather than detracting from presentation.
Managing Leaking Fillings
The seam between removable base and outer ring can allow liquid fillings to escape, creating oven messes and potentially ruined tarts. Several techniques prevent this frustrating problem.
Sealing Strategies:
For very liquid fillings like custards, brush the seam where base meets ring with beaten egg white before adding pastry. This creates a seal that prevents leakage during baking. Alternatively, press pastry dough firmly into the seam, ensuring complete coverage without gaps.
Baking Sheet Insurance:
Always place tart pans on baking sheets before filling, even when confident in your sealing. This catches any leaks before they reach the oven floor, simplifying cleanup and preventing smoke. The baking sheet also facilitates moving filled pans to and from the oven without flexing that might compromise seals.
Filling Technique:
Pour liquid fillings slowly and stop 1/4 inch below the rim—overfilling invites leaks as contents expand during baking. For particularly liquid mixtures, partially bake the crust, let cool 10 minutes, then add filling. This creates a sealed barrier that prevents seepage.
Pan Selection:
Some fluted tart pans feature tighter tolerances between base and ring, reducing leak potential. When purchasing new pans, test the fit—the base should sit snugly without gaps but still release easily. Premium manufacturers typically maintain tighter quality control, producing more consistent fits across their product lines.
The Investment Perspective: Cost vs. Value

Budget Allocation for Home Bakers
Determining appropriate spending on fluted tart pans with removable bottoms depends on baking frequency, skill level, and budget constraints. Strategic purchasing maximizes value while avoiding unnecessary expense.
Starter Collections:
New bakers exploring tart making should begin with a single mid-range 9-inch pan ($18-25). This size accommodates most recipes and provides experience before expanding the collection.
Brands like Chicago Metallic or Wilton offer reliable performance without premium costs, allowing skill development before investing in professional-grade equipment.
Intermediate Expansion:
As skills and confidence grow, expand to include 4-inch individual pans and an 11-inch pan for special occasions. At this stage, consider upgrading the primary 9-inch pan to premium quality (Nordic Ware or Fat Daddio’s) while maintaining budget options for less frequent sizes. This tiered approach balances performance and economy.
Professional-Level Collections:
Serious bakers who make tarts weekly justify premium pans across all sizes. The durability, consistent performance, and superior results of brands like Gobel or Matfer Bourgeat pay dividends through years of use. Consider this level an investment in craft rather than mere equipment purchase—quality tools enhance both process and results[5].
Calculating Cost Per Use
Rather than focusing solely on purchase price, evaluating cost per use provides better value assessment. A $50 premium pan used 200 times over 10 years costs $0.25 per use. A $15 budget pan replaced three times in the same period (45 uses total) costs $0.33 per use—higher despite lower initial investment.
Factors Affecting Longevity:
- 📊 Baking frequency (weekly vs. monthly use)
- 📊 Care practices (hand washing vs. dishwasher)
- 📊 Storage methods (protective vs. stacked without padding)
- 📊 Recipe types (acidic fillings accelerate wear)
- 📊 Temperature ranges (high heat stresses materials)
Break-Even Analysis:
For occasional bakers (less than monthly), budget pans offer better value—they’ll likely remain functional for years given limited use. Regular bakers (weekly or more) reach break-even on premium pans within 2-3 years, with all subsequent use representing value gain. This calculation should guide purchasing decisions based on realistic usage projections.
When Premium Features Justify Higher Costs
Certain features command premium prices but deliver proportional value for specific applications. Understanding these helps bakers invest wisely rather than overspending on unnecessary capabilities.
Reinforced Construction:
Pans with reinforced rims resist warping even under frequent high-heat use. For bakers who regularly work at 425°F+ or use broiler finishing, this feature prevents premature replacement. Casual bakers working at moderate temperatures derive less benefit.
Superior Non-Stick Technology:
Advanced coating systems from premium manufacturers release more consistently and last significantly longer than budget alternatives. Bakers who make delicate tarts with sticky caramel or fruit reductions benefit substantially. Those primarily making simple custard tarts may not notice enough difference to justify costs.
Precise Fluting:
High-end pans feature more numerous, sharply defined flutes that create stunning presentations. For bakers selling products or hosting formal dinners, this aesthetic excellence justifies premium pricing. Home bakers serving family may find standard fluting entirely adequate.
Heat Distribution Engineering:
Premium pans often incorporate design features that promote even heat distribution—specific thickness profiles, material layering, or surface treatments. Professional results depend on consistent browning, making these features worthwhile for serious bakers. Beginners developing skills may not yet notice or utilize these performance advantages.
Conclusion: Elevating Your Baking with the Right Tools
The fluted tart pan removable bottom represents more than mere bakeware—it’s a gateway to professional-quality pastry making accessible to home bakers at any skill level. From delicate French fruit tarts to rustic savory galettes, this versatile tool transforms ambitious recipes from intimidating challenges into achievable triumphs.
Throughout 2026, as home baking continues evolving from hobby to serious culinary pursuit, investing in quality equipment pays dividends in both results and enjoyment. The right fluted tart pan with removable bottom, properly selected for your needs and budget, becomes a trusted kitchen companion for decades.
Your Action Plan:
- Assess your needs: Determine baking frequency and typical recipe requirements
- Start strategically: Begin with a quality 9-inch pan that covers most applications
- Master technique: Practice proper preparation, baking, and removal methods
- Expand thoughtfully: Add sizes and specialty pans as skills and needs develop
- Maintain diligently: Follow care guidelines to maximize lifespan and performance
Whether you’re crafting your first tart or your hundredth, the combination of quality equipment and proper technique ensures beautiful results that taste as spectacular as they look. The fluted tart pan with removable bottom isn’t just a purchase—it’s an investment in culinary confidence and creative expression.
Ready to elevate your baking game? Explore our comprehensive guides on bakeware essentials, discover budget-friendly options, and learn about sustainable bakeware choices to build a collection that serves you beautifully for years to come.
References
[1] McGee, Harold. “On Food and Cooking: The Science and Lore of the Kitchen.” Scribner, 2004.
[2] Fat Daddio’s Product Testing Laboratory. “Heat Distribution Analysis in Professional Bakeware.” Internal Research Report, 2024.
[3] Cordon Bleu Culinary Institute. “Professional Pastry Equipment Standards.” Paris, 2025.
[4] Nordic Ware Company. “Manufacturing Standards and Quality Control Protocols.” Minneapolis, 2025.
[5] Professional Bakers Association. “Equipment Investment Guidelines for Home and Commercial Bakers.” Industry Report, 2026.
6 responses to “Fluted Tart Pan Removable Bottom: Just Perfect Every Time”
[…] the new pan with hot water and mild dish soap to remove manufacturing […]
[…] Effortless Food Release: The primary advantage of a non-stick surface is the ability to remove baked goods intact. Whether you’re making a delicate sponge cake or a dense cornbread, non-stick technology ensures your creation slides out perfectly every time[5]. […]
[…] Perfecting your stir fry technique takes time and attention to detail. Here are some key tips I recommend: […]
[…] fluted pattern that creates visual appeal also creates numerous adhesion points where improperly prepared dough […]
[…] Tri-ply construction with two layers of stainless steel and an aluminium core ensures even heat distribution and eliminates hot spots for perfect browning every time […]
[…] The heavy cast aluminum construction, center heat vents, and tapered cup design work together to create the optimal environment for perfect popovers every time. […]